 If coding sounds intimidating to your students or to you, you’re not alone. The good news? Scratch takes all the scary parts away.
Instead of typing lines of code, your students will build programs by snapping together colorful blocks that fit like puzzle pieces. It’s playful, visual, and easy to follow, so students can focus on what they want to create instead of worrying about syntax errors.
Easy to learn does not mean it is not scalable with students. A quick search online and you will find games people have created that are multi-level and in-depth. Of course, a time might come where students who are really into coding could move on to traditional coding languages, but for the average student, Scratch will be more than enough to get their introduction into coding and creating some cool projects to share.
Learning alongside students is definitely an option with Scratch, but there are also guided tutorials you can use to teach the lessons as well.
Scratch is completely free and it’s web-based. This means no budget barriers, subscriptions to setup, or apps to install. Students don’t even need to make an account on the website if they don’t want to, but they will have to download their projects to save if they don’t have an account.
Go to the website here and your first time will guide you through a short tutorial of how it works. From there, you can instantly start dragging blocks out to create your project.
No Account: To save a copy of your project you can click File > Save to Computer. Then, when wanting to work on it again, go to the website and click File > Load Project.
With an Account: Alternatively, create an account and your projects will be saved to access anywhere. You can also control settings if they are available publicly for others to see.
Scratch is designed for kids, so you don’t have to worry about a steep learning curve. The blocks are color-coded, clearly labeled, and easy to drag into place. There’s no need for typing, formatting, or memorizing commands.
Your students can jump right into building simple projects and grow their skills over time. You’ll love watching how quickly they gain confidence as they bring their ideas to life.
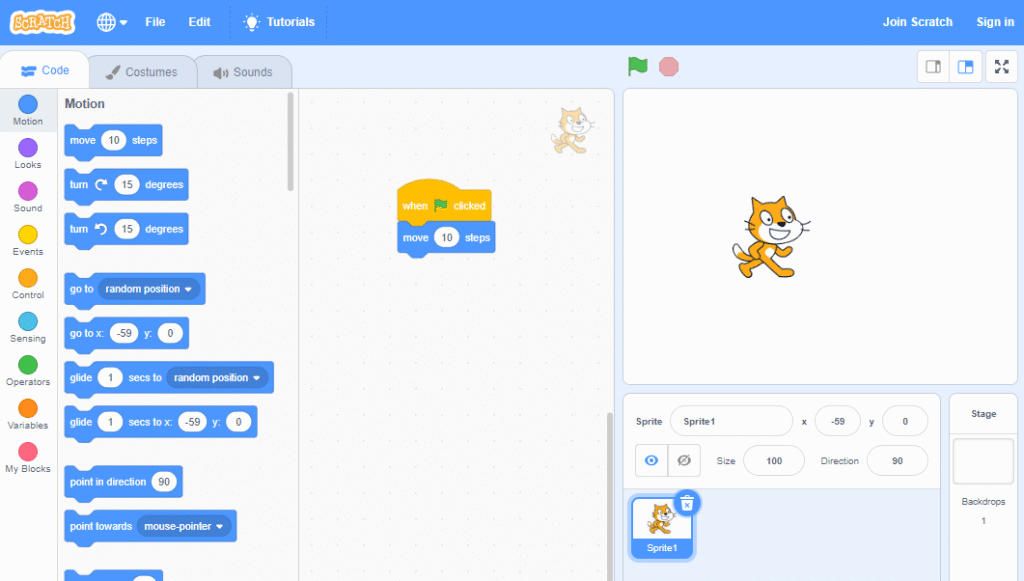
Let’s walk through it together. Head to the Scratch website here, and you will see the Scratch Cat waiting on your screen for something to happen to him.
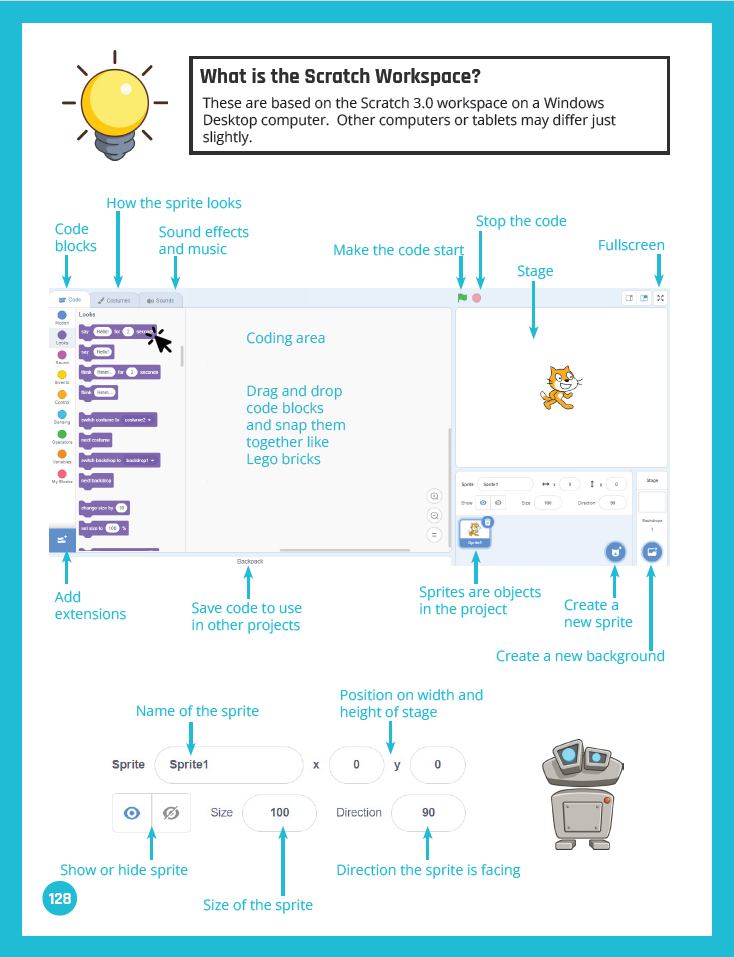
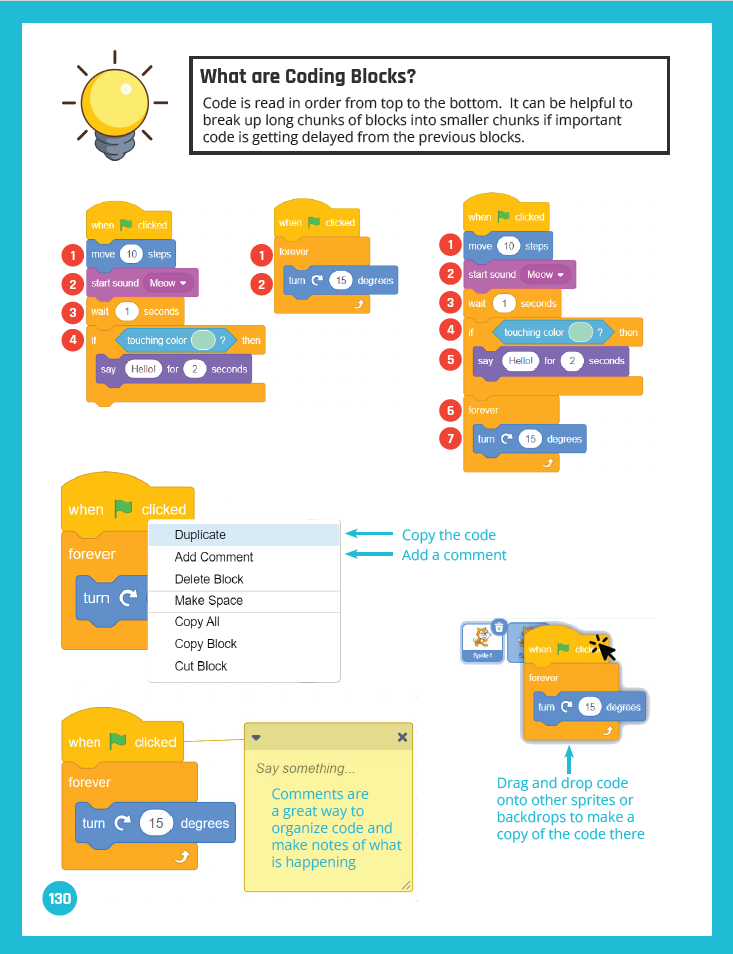
In the far left toolbar, you will see the color-coded dots that sort each type of code block. By default you will see the blue Motion blocks.
Click, hold, and drag the first block move 10 steps onto the coding area to the right.
Now, click on the yellow Events button in the far left menu.
Click, hold, and drag the first block when 🏴 clicked onto the coding area to the right.
Finally, drag the yellow block above the blue block so they click together. Press the green flag button above the window where the Scratch cat is and watch him move.
Try another block!
 🆘 What are all the windows and blocks?
Want to know more about all the windows, blocks, and options you see when looking at the Scratch interface?
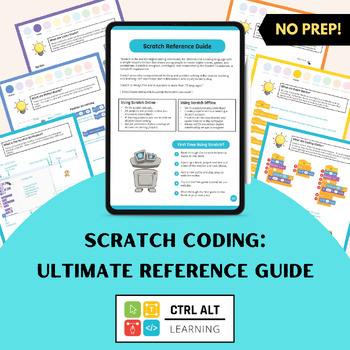
Check out our free Ultimate Scratch guide that explains each of the blocks and the different windows.
Scratch isn’t only for computer class. You can use it to reinforce learning in any subject area.
Have students animate the water cycle in science, build a quiz on multiplication facts, or retell a historical event using characters and speech bubbles. It’s a great way to help them connect with information and show their understanding in a new way.
Follow along with this mini-tutorial and then guide your students through the same process.
Head to the Scratch website here, and you will see the Scratch Cat waiting on your screen for something to happen to him.
If you’re still there from previously, you can right-click on your old code blocks and choose delete. Or, click, hold, and drag them back to the toolbar on the left to make them disappear
In the bottom right corner, you will see a blue button with a cat head. Hover over the button and choose the search option.
In the search bar type story and you will see the full alphabet of options. Select the first letter in your name. It will now appear beside the Scratch cat on the main stage.
Now would be a good time to select the cat icon (titled Sprite1) and delete it by right-clicking or selecting the trash can.
 Repeat the above process until you have spelled your name. You can click the letters on the main stage and drag them around to where you want them to be to spell your name.
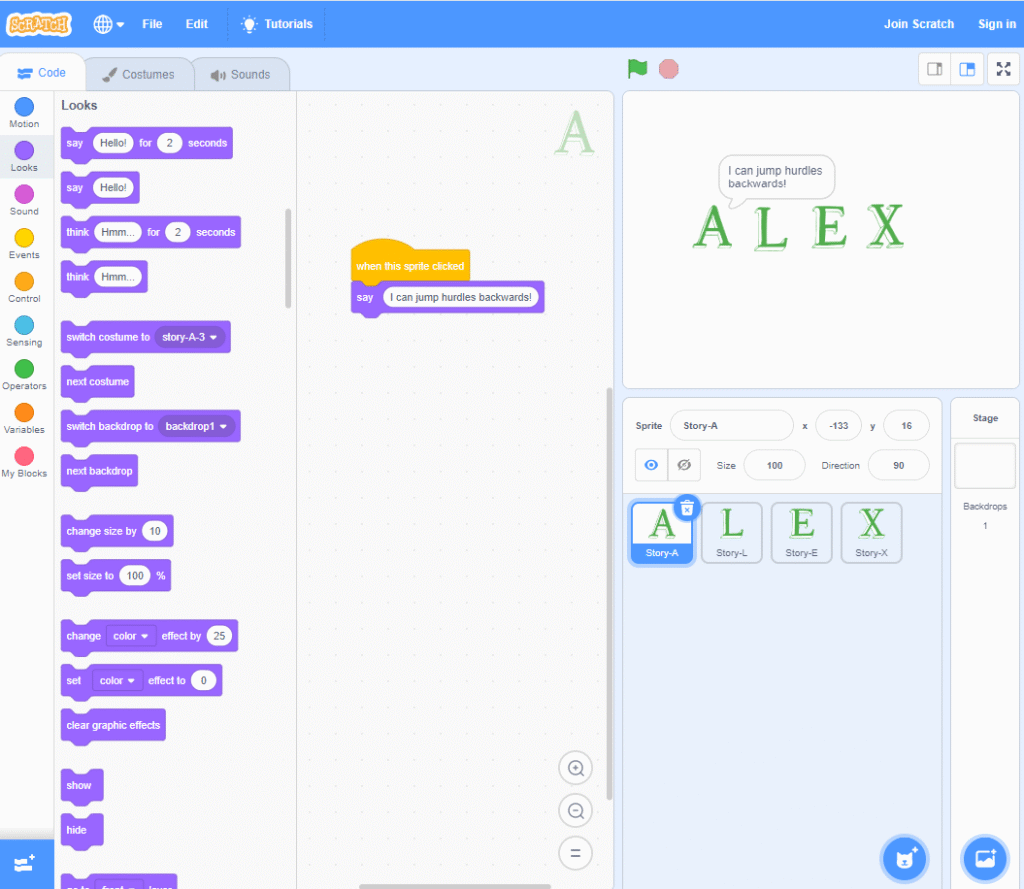
Click on the icon for your first letter. It will be titled Story-A (or whatever letter you have selected).
Go to the Events blocks (the yellow circle) and drag out the block when this sprite clicked to the main coding area.
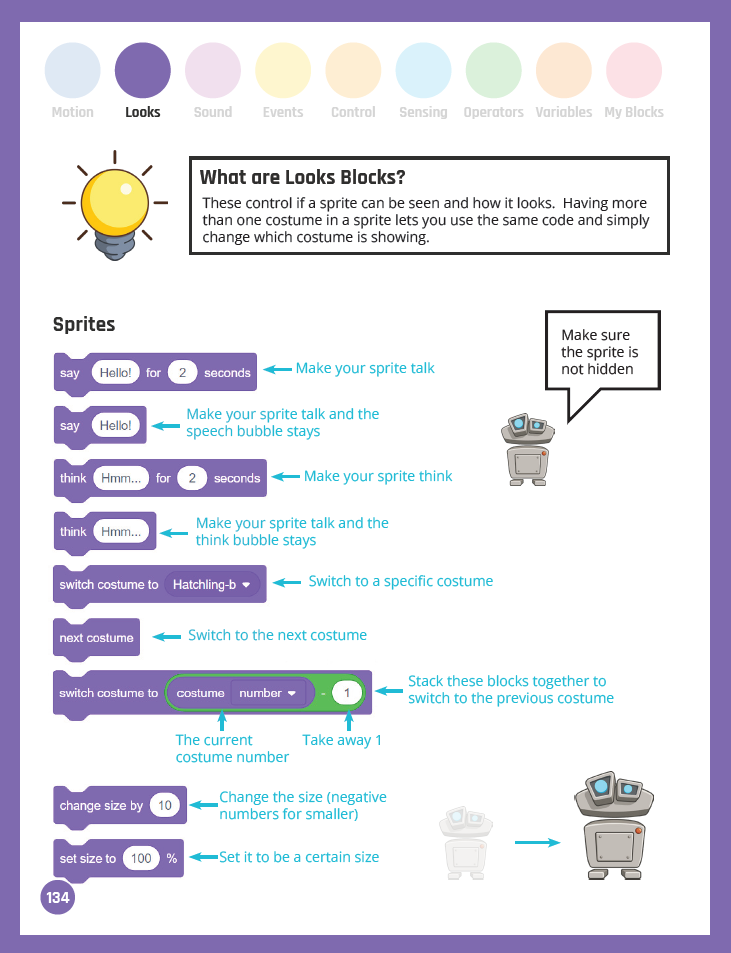
Go to the Looks blocks (the purple circle) and drag out the second block say Hello! and click it to the when this sprite clicked block. Change out the text to say a fact about yourself.
Repeat this process for the rest of the letters.
Now give it a try! Take some time and check out the other blocks in Motion (blue), Looks (purple) and Sound (pinky-purple) to see what else you could add to the project.